So on to the final projects.
It was about about 2:oo in the afternoon when we started these last projects. I was just about worn out from all that hammering from the petal necklace but there was still more to do and I was having such a great time. 🙂 It really made me realize the stamina you would need to be a bench jeweler for 8 or more hours a day. It gave me a new found appreciation for this artform.
The two final projects were sterling silver bracelets.
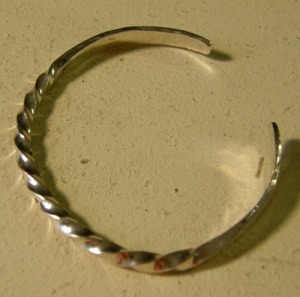
The first bracelet was a twist bracelet.
We starting this bracelet with a piece of 10 gage square sterling silver wire. First we measured the distance on each end of the wire where the twist was going to start. I set my marks at 1 1/4″ from each end of the wire. The next step was to place one end of the wire in a vice. The mark on one end of the wire was place at the edge of the vice. On the other end, you place the wire in a set of vice grips and twist the wire.
I thought that would be really easy but I had never used a pair of vice grips before. I had no idea how to lock down or add tension on a pair of vice grips. I felt kind of silly asking how to use a piar of vice grips but no question is a dumb question, right?
I twisted the wire 3 full revolutions to get the tight twist on the wire.
The bracelet was then hammered on each end to get the flat portion of the cuff.
Now came the most difficult part, acutally shaping the piece of wire into the bracelet. Using a stepped bracelet mandrel and a rawhide mallet we formed the bracelet around the mandrel. This took quite a bit of time and a lot of hammering.
The final step was to polish the bracelet with the polishing wheel.
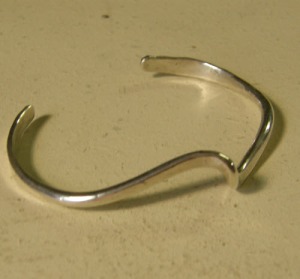
The next bracelet was a center-twist bracelet. This one actually looked really hard to make, but I thought it was one of the easlier pieces to make.
I started the bracelet with a piece of round 10 gage sterling silver wire. The wire was flattend on the steel bench block and then I marked 1″ from each end of the bracelet and the center of the piece of wire.
The wire was flattened on each end up to the 1″ mark and then with ring bending pliers the wire was clamped at the center point of the wire. The wire was then bent into a long u-shape.
After the u-shape was formed the wire was hammer flat 1″ from the center of the wire on each side.
The wire was then bent back out straigt leaving the cetner twist in the bracelet.
The next step was to form the bracelet on the bracelet mandrel with the rawhide mallet. Using the bracelet mandrel and mallet were a little bit easire this time but it was still difficult.
The final step was to polish the bracelet. I think this piece turned out the best from all the pieces I made during the workshop. This was definitely a great workshop! I left me wanting more.
What I learned from this project:
- Using a bracelet mandrel and rawhide mallet
- How to polish with a flex tool and polishing wheel.
- How to use vice grips.
I know that I am totally hooked on metal now…… 🙂 🙂
Filed under: Education and Training, Handcrafted Jewlery | Tagged: Artisan, bracelet, Forging, handcrafted jewley, Jewellery, jewelry, Metalsmith, Necklace, Pliers, Precious metal, Rio Grande, Sterling Silver | 2 Comments »


 Bindu
Bindu Crafty Froggy
 Fine Designs
 Marokel
 Rozine's Ink
 Tali's Creations
 Twisted Stone Designs


